In ball hockey, everyone loves to yell “forecheck!” but most players are doing it wrong.
Forechecking isn’t just about chasing the ball like a golden retriever. If you don’t time it right, angle correctly, or support the first forward in, you’re not creating pressure, you’re creating a breakout for the other team.
This post breaks down how forechecking actually works, and how to do it with purpose, not chaos.
What Is Forechecking … Really?
Forechecking is the pressure applied to the opposing team as they try to break out of their zone. But it’s not just sprinting at their defense.
The goal of a forecheck is to:
- Force a turnover
- Pin the puck/ball in the zone
- Take away clean breakout options
- Force a rushed or risky pass
That only happens if you think one move ahead and force mistakes — not just create traffic.
What Forechecking Is Not
Let’s clear this up:
- It’s not two guys blindly chasing the ball
- It’s not pressure with no plan
- It’s not just cardio or “energy”
Bad forechecking = double-teaming one side and giving up an odd-man rush the other way. You’ve probably seen it 10x a game.
Keys to a Smart Forecheck
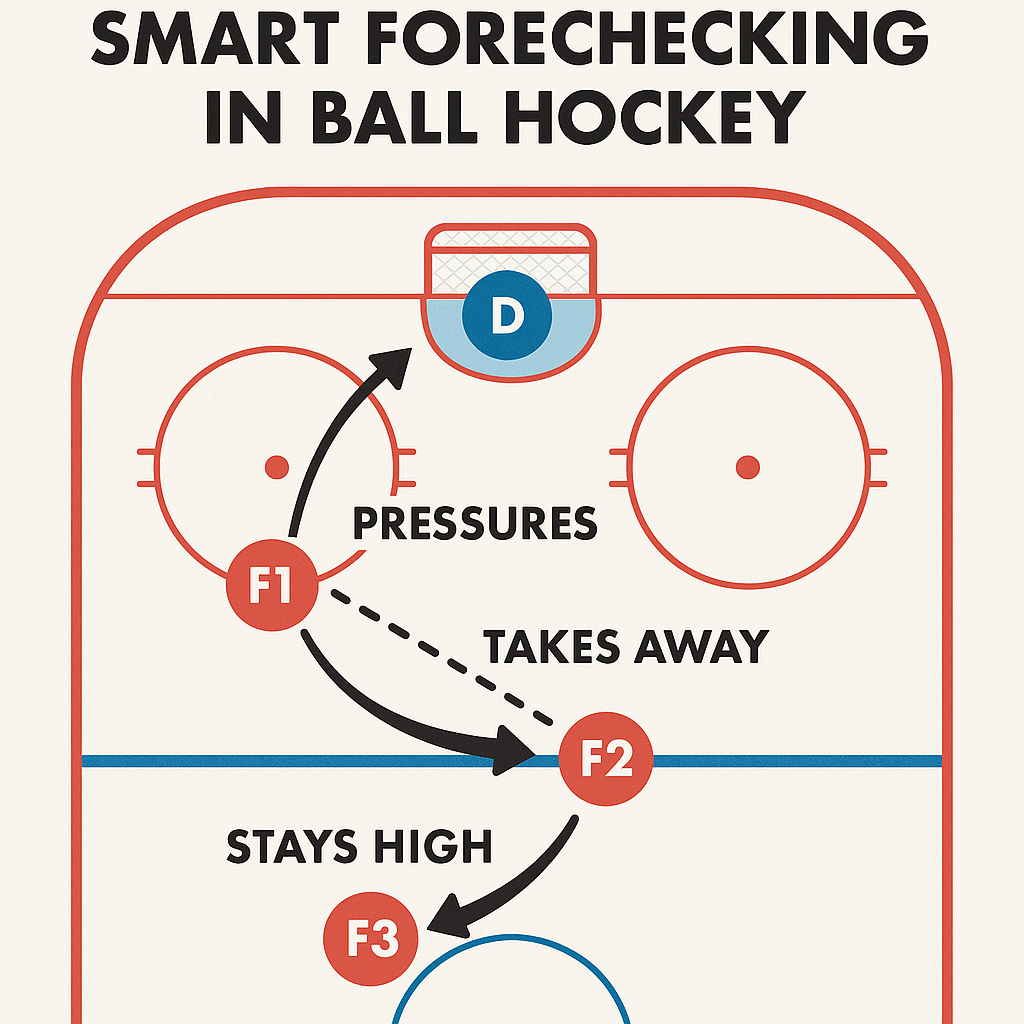
1. First Forward (F1) Sets the Trap
- F1 applies direct pressure, fast, but under control
- Don’t just charge, angle your approach to take away the strong-side outlet pass
- Your goal is to funnel the puck toward the wall or into a mistake
Good F1s don’t just chase. They dictate where the play goes.
2. Second Forward (F2) Reads & Reacts
- While F1 pressures, F2 takes away the next pass
- This is where most teams fail, F2 isn’t in position to capitalize, so pressure is wasted
- You’re not forechecking to get a stick lift, you’re forechecking to trap and steal
3. Third Forward (F3) Stays High if 5 on 5
- This player protects against the breakout
- F3 should be high and central, reading the play
- You’re the safety net. If F1 or F2 miss, you buy time to recover
What Smart Forechecking Looks Like
Scenario: Opposing D recovers the ball behind their net.
- F1 angles in fast from the side, cutting off the strong-side pass
- F2 shades toward the weak-side option or steps into the slot
- D is now under pressure, no clean outlet, and forced into a risky rim or turnover
- F3 holds the line to pick off a pass or pinch when safe if 5 on 5
Result: You trap them, force a bad pass, and get the ball back with possession in the zone
Common Forechecking Mistakes
- F1 overcommits and gets danced around
- F2 is late or floating, not denying options
- F3 pinches early, leaving the D exposed if 5 on 5
- Everyone goes at once, nobody supports
Bad forechecking gives up 2-on-1s. Smart forechecking wins possession.
Final Thoughts: Forecheck With a Plan or Don’t Bother
A great forecheck doesn’t just work harder, it works smarter. It’s about angles, pressure timing, and playing like a unit of three.
When done right, you’ll frustrate teams, force turnovers, and spend way more time in their zone.
When done wrong? You’re basically handing them rush chances and wasting energy.
So next time your bench yells “pressure!”, ask yourself, what are we actually taking away?

